Overnight contacts for perfect daytime vision?

A lot of people with vision problems don’t like wearing glasses, and they get annoyed with the responsibility of contacts…but you need to maximize the vision you have, right? So you either need to wear glasses or pop in those contacts and deal with the irritation that can occur, things getting stuck in your eyes, the itching, etc. If you have had poor vision from birth, this new trick won’t really help you, but if you are one of the many people who start suffering from presbyopia (the age-related loss of near vision), this new research can benefit you!

Who can benefit?

Most people by middle age suffer from some form of presbyopia. As we age, the lens of our eyes tend to have less elasticity and less ability to tighten and loosen, making it more difficult to tighten to view things near you. This is why you will see some middle age people holding menus out at arm length to read them, and needing reading glasses to view things right in front of them.  And the people who suffer from presbyopia, can most benefit form this new research.

contactsWhat is the latest study?

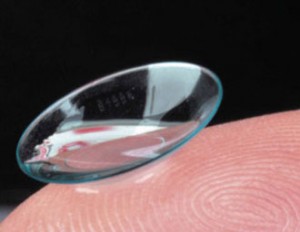
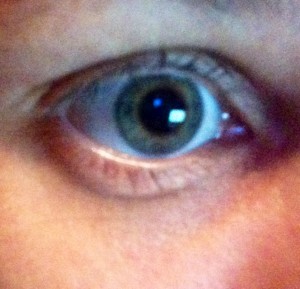
Some research out of Australia suggests that a new therapy called hyperopic orthokeratology (OK), which is a special contact lens that you wear only at night to help flatten your cornea at night, and the results last throughout the day. The study was performed on 16 middle-aged (43-59 years old) and one eye was treated with the lens at night and the other wasn’t.  It was found in all participants that they treated eye, had near perfect vision all day without the need for a contact lens; after one night vision was improved and it only got better each day of the study (which lasted a week). These lenses help to change the shape of the cornea so you have better vision, very similar to wearing a retainer to help shift/change placement of your teeth; it works great in short periods of time off (i.e. during the day) but if you stop wearing your retainer (or these special OK contacts) your eyes will return to their natural state within a week, so it is a commitment to wear them at night. Plus, it is a great alternative for those afraid of having eye surgery to treat their vision changes!

It is an interesting treatment plan, and it is still a commitment, but I think it is truly a benefit that you can sleep with the lenses in place, and then need nothing to treat your vision all day, and there is no need to go under the knife, if you choose not to.  Plus, it is a huge statement that all of the participants in the study saw a benefit.  If you suffer from presbyopia, then talk to your Healthcare Provider about the benefits of OK therapy, and if it might work for you!

Yours in Good Health

B

July Exercise Challenge: Lose that Arm Jiggle!

Ask and ye shall receive! I was asked for more upper body sculpting in the July challenge….however there was a lot of dislike for the June Challenge push ups (which are a fabulous upper body workout!) So, despite the fact that I have been trying to keep these workouts as “prison” workouts (i.e. you need nothing more than your own body to make them happen), we will be stepping it up this month and we need to use dumbbells for this one, so use whatever weights you are comfortable with (2lb-6lb to start) and then increase as you feel comfortable throughout the month. We want to strengthen our triceps and biceps, to make the upper body, shoulders, and arms looked toned and taught.  In conjunction with the planks, squats, push ups, and bicycle crunches we’ve been doing, our bodies should be rocking right now!!

We will we focusing on two main exercises:

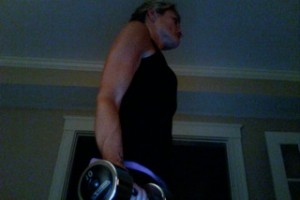
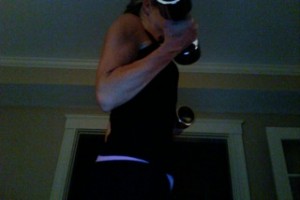
Bicep curls: Tone your upper arm muscles AND make activities of daily life easier, like carrying kids, groceries, lifting various items, and you will look better in sleeveless outfits! hold your dumbbells, with you feet shoulder width apart, palms facing forward, shoulders and back straight, elbows in to your sides, and squeeze your biceps to pull the dumbbells up, then slowly go down to the starting position.


Starting point

Starting point

Chair Dips: Helps to get rid of arm jiggle and tone, strengthening those

Ending point

Ending point- Bicep Curl

triceps! How to do it? Sit on the edge of a chair, while sitting on the chair, grasp the side of the seat, move your butt off the edge of the chair (with your legs straight in front of you), keeping your back straight and shoulders at a neutral position, lower your self down as far as you can go, then pull yourself back up in a slow controlled motion.


For everyone who has been doing the previous challenges (April, May, and June) , I encourage continuing with 75 crunches a day, 5 minutes of planks, 50 bicycle crunches, and 25 push ups….and some cardio (at least 15-20 minutes of brisk walking, running, biking, etc) then we are adding these on top! This is starting to get REAL 🙂

The July Challenge Schedule:

1: 5 Chair Dips and 10 Bicep curls

2: 10 Chair Dips and 20 Bicep Curls

3: 15 Chair Dips and 25 Bicep Curls

4: 15 Chair Dips and 30 Bicep Curls

5: 20 Chair Dips and 35 Bicep Curls

6: 20 Chair Dips and 40 Bicep Curls

7: Rest Day

8: 25 Chair Dips and 45 Bicep Curls

9: 30 Chair Dips and 50 Bicep Curls

10: 30 Chair Dips and 55 Bicep Curls

11: 35 Chair Dips and 60 Bicep Curls

12: 40 Chair Dips and 70 Bicep Curls

13: 45 Chair Dips and 80 Bicep Curls

14: Rest Day

15: 50 Chair Dips and 90 Bicep Curls

16: 60 Chair Dips and 100 Bicep Curls

17: 70 Chair Dips and 110 Bicep Curls

18: 75 Chair Dips and 120 Bicep Curls

19: 80 Chair Dips and 130 Bicep Curls

20: 90 Chair Dips and 140 Bicep Curls

21: Rest Day

22: 100 Chair Dips and 150 Bicep Curls

23: 100 Chair Dips and 160 Bicep Curls

24: 110 Chair Dips and 170 Bicep Curls

25: 120 Chair Dips and 175  Bicep Curls

26: 125 Chair Dips and 180 Bicep Curls

27: 130 Chair Dips and 190 Bicep Curls

28: Rest Day

29: 140 Chair Dips and 195 Bicep Curls

30: 150 Chair Dips and 200 Bicep Curls

Remember if you are having pain or discomfort, focus on your body positioning, and you may need lower weights, or just to take a break.  I have added in a break every 7 days, but listen to your body and if it needs it, take a break; you will be sore, so drink plenty of waters to flush out the lactic acids, but if you feel more than sore, and you feel pain, then reassess and take a break, if you need to.  And, as always, if you have a medical condition, please check with your Healthcare Provider (HCP) that it is OK to be a part of this challenge.

*And don’t forget to join our Facebook group for added tips and group support!

Yours in Good Health

B

Squeezing Breast Tissue May Prevent Malignant Cancer Cell Growth

There are always tons of faux “research” studies placed on the internet that go viral and people get all aflutter about nothing, so I really thought for sure that this was another bit of internet hokum, but I always have to delve deep! Apparently there is some validity to this study, but lets not just start groping women in the name of science, there is always a time and a place for things, plus, the study that was done wasn’t based on people grabbing breast tissue in a recreational manner.

What is the Research?

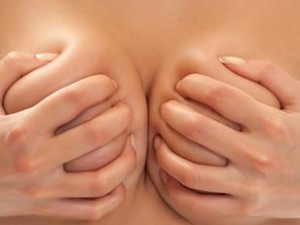
At the University of California Berkeley, a study was performed looking at the effects of physical pressure on malignant (or abnormal cells) and their growth, and actually visualize of this pressure helped to change how the cells grew and their patterns.  They were able to use flexible silicone chambers, that housed malignant cells, and they found that when the pressure was high enough, during the first stages of growth, the cells actually started to  mutate, in a good way, and start growing in a healthier and more organized fashion. Essentially, by squeezing the cells, they were able to redirect how the cells grew.  Once the tissue was structured as breast tissue should be, they stayed in a normal state.  The malignant cells that had no pressure applied to them, grew with no true structure and just as typical cancerous cells grow, without purpose and causing destruction. squuze boobs

What does this mean?

Well, as I said, it doesn’t give people carte blanche to go around groping women’s breasts BUT it should add fervor to your monthly self exam (maybe check weekly, ladies!) but it is a huge leap forward in breast cancer research.  There have already been companies attempting to create cancer detecting bras, maybe they can create compression bras (or weren’t those just called corsets??) On a serious note, do feel free to really squeeze with your self breast exam, and anything abnormal that you may feel….and then go see your healthcare practitioner (HCP).

And, I guess there is a new pick up line out there for anyone who wants to feel some breasts….just what we all needed!

Yours in Good Health

B

Oculolinctus, the new “second base”: Is it safe?

There is a new sex fetish that has gained fervor over in Japan that has started to make its way over to the US is known as oculolinctus. It is mostly becoming big in the late adolescent/early teen age group and it is also called “worming” and it is becoming THE way to express themselves sexually. I hear about a lot of different things that people do to express themselves sexually, but this one that really creeps me out.


eye 2What is Oculolinctus?

Basically, it is eye-licking, for sexual gratification. The eyeballs (the corneas, really) are covered with many tiny nerve endings, that can be excited with licking and make the eye feel very sensitive.  Apparently it is all the rage and the equivalent to “second-base” so when the tweens (it seems to be big in the 12-13 year old age group) get bored with making-out (or kissing) they move on to eye-licking. Seems like an obvious next move to me….(I’m actually being quite sarcastic, this one blows my mind).

Is it harmful?

In a word: yes. In general, it’s not a good idea to stick things that are not prescribed into your eyes (such as contacts, eye drops, etc.) because you risk doing damage to your eyes. Our tongues have tons of microorganisms that are on them at any given time (because of eating/drinking food, breathing, etc) so sticking your tongue with microorganisms and which can be rough with taste buds, can lead to corneal abrasions or ulcers and eye infections.  The microorganisms and bacteria can also lead to styes (infections in the glands of the eye) and untreated infections can cause blindness. You could also transmit herpes and chlamydia from the mouth to the eye which can be very difficult to treat.

Is this really wide-spread?

At one school in Japan, teachers noticed a high number of 12 & 13 year olds coming to school with eye patches, then started asking about the infections, which lead to the discovery of this practice. But it is, at this point, a major public health issue with around 1/3 of all 12 year olds reportedly practicing oculolinctus and there has been a significant increase in eye infections.  HCPs have been treating many young lovers eyes to keep their peepers healthy, and while Japan has a high number of tweens engaging in their behavior, it has been found in other countries and the U.S. Virgin Islands has been also found to have a higher percentage of teens/tweens practicing oculolinctus as well.

Parents and Healthcare Providers alike should ask tweens and teens about this behavior, and warn them about the risks. When I was younger feeling boobs was second base, maybe they should stick to that, it is less risky and no one has to have a tongue in the eye! (Every nurse has a thing that sends them over the edge, that is eyeballs for me….) But, talk to your kids, if they are getting eye infections, and you are concerned, talk to their HCP so the discussion can come from them from a purely health perspective, but keep them safe and free of eye injury/infection.

Yours in Good Health

B

Hydrate with your OWN flavored water!

I understand that you are sometimes on the go, and grab a pre-made flavored water from a grocery/convenience store, but despite the labeling as “all natural” there is a good chance there are things in your water that you wouldn’t expect. So, why not filter your own and make it tasty with ingredients of your own choosing? I do it all the time and it is a little burst of excitement on my palate that makes me stoked to drink my daily two liters, which can get boring when all you drink is plain water!

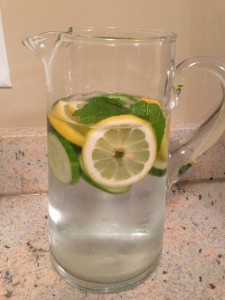
It is so easy to make yummy water, with no calories, that are refreshing and will rehydrate you.  One of my favorites? Slice a half cucumber, 6 mint leaves, and slice a lemon and place in the bottom of a pitcher, fill the pitcher with filtered water, and chill.  You can also do cilantro and orange slices to water, or just plain cukes. And not only does it taste great, but it looks good when you serve to people.

With organic sweet mint right from my garden!

With organic sweet mint right from my garden!

A little known secret, I always carry around a water bottle with me at work (BPA free) and I add different citrus fruits to my water (a squeeze of lemon, lime, orange, clementine), or a slice of peach/nectarine, a strawberry, blueberries, just a little something to give my water that kick of flavor that not only keeps me drinking it, but I feel like it gives me that little bit of sweetness I sometimes crave, so I don’t tend to reach for my afternoon Skittles as often.  (I am cutting back on candy….I love it, but I know how bad it is for me, and it is SUCH a hard habit to kick!) That little bit of natural sweetness from my favorite fruits in my water helps to prevent me from reaching for my candy.

If you want to add just a little jazziness? Filter water, either chop mint leaves, or put the little ones in ice-cube trays, and fill with plain water and freeze. Add those cubes to your water, and as they melt, you get some bursts of mint! Or if you make unsweetened iced tea, add those mint cubes with a squeeze of lemon, and you have a fabulous, no calorie, refreshing beverage!

Plus?  Adding cucumbers, mint, etc to my water make me feel like I’m in a spa and relax me! So do something nice for yourself, like make yummy water, and your body will feel the immediate benefits of hydration and a taste sensation all at once!

Yours in Good Health

B

Should the Morning After Pill be available to all Over-the-Counter?

Not too long ago I wrote about the morning after pill, what it is, and how it works. At that time, it was available Over-The-Counter (OTC) to women 17 years old and over, and below that, women (girls) needed to get a prescription to use the medication to prevent pregnancy.

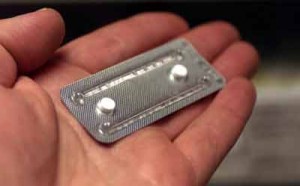
When used within 72 hours after another failed form of birth control, there is a 90% success rate in preventing unwanted pregnancy. I know there is some debate among people, but from a strictly medical standpoint, it is not an abortion pill, because it merely causes irritation to the lining of a uterus, thus not allowing anything to adhere or become fertilized and start growing. It won’t abort and already growing fetus, and should not be taken if you already know that you are pregnant.  morning-after-pill

Recently, legislation has changed. It has been highly debated at which age group the pill should become available without prescription, in 2011, here in the US, it was decided that above 17 years old can get it as an OTC. More recently legislation has changed (granted it is being opposed) so that women of any age can obtain the medication as an OTC. I have mixed emotions on this one: I think that everyone should have a right to medications that would help to prevent pregnancy after a mistake/failed birth control attempts, but should 10, 11, 12-year-old girls be able to walk in and get the morning after pill, if they are sexually active, and not be counseled regarding Sexually Transmitted Infections, or the effects of the Plan B medications on their body, or on how it would be better for them to be on regular birth control, if they continue to choose to be sexually active.  And then there are the young girls that don’t choose to be sexually active but may be forced.  Are we missing a population that needs our help and interventions?

How do parents feel about this? Would you want to know if your young daughter was using the morning after pill? I guess not giving young women the option of having Plan B as OTC, leads them to possibly make other unhealthy choices, or try home “remedies” to prevent pregnancy, which may be dangerous.

I do like the option of women/girls having the right to make their own medical decisions without the need to get an HCP appointment and then get the prescription filled, and there has been no proven negative effects on their bodies (physically) but I am wondering the mental/psychological effects,and if we could do better as HCPs to intervene and help these women. I am really torn, and I am interested what you all think about this, as it is something that almost every woman has an opinion on: When are we being too free with Plan B administration, and when should we step in?

Yours in Good Health

B

Eat for Exercise: Nutrition is the key to success

It is kind of true “you are what you eat” especially when it comes to pushing yourself with exercise. I have many people that have joined me on the exercise challenges in the past few months, and I made comments about certain workout days being rougher due to poor diet the day before and that always brought on a slew of questions wanting me to clarify further, so I thought I would! Plus, it is crucial to eat correctly when pushing yourself physically, so that your body can work optimally, otherwise you put yourself at risk for overtraining and getting hurt or sick.

What should I focus on?

There are a few different schools of thought, and it does truly depend on your goals of working out.  For example, if you are looking to build large amounts of muscle, you will need to significantly increase your protein intake (lean proteins).  But, if you are someone who is doing a workout challenge, and the goal is to tone up and perhaps slim down, you want to focus more on endurance, so that your body is able to keep up the intensity with exercise, and you aren’t starving all of the time, but you are eating clean and healthy to maybe lose a few extra pounds.

You should start your day out right, whether you eat breakfast or drink it (in smoothie form) you really should include oatmeal: it is a complex carbohydrate that is full of fiber, so it is slow for your body to digest, and it helps keep your blood sugar at a steady level, so you don’t get a sugar crash, and it will help keep up your stamina for the day. So either eat oatmeal in the morning with some fruit OR add it to your smoothie. Smoothies are great because you can get your calcium from dairy, carbs from oatmeal, and your daily fruits all in one meal!

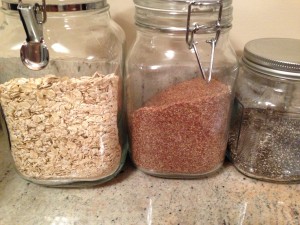
Oats, Flax, and Chia (all parts of my morning smoothie)

Oats, Flax, and Chia (all parts of my morning smoothie)

For a snack, eat either nuts or peanut butter, almond butter, etc to boost protein and despite a high fat content, it is good for you because it gives you the energy you need, satiates your hunger, and also gives you that boost of protein power. I like to eat peanut butter on celery or carrots to get my vitamins and nutrients from the vegetables and also get that extra bit of protein. You can also make a trail mix with dried fruits and nuts to boost your energy and get in some endurance boosting proteins.

Your lunch and dinners should consist of vegetables and lean proteins. Honestly, for people on the go, the Bolthouse Farms Protein shakes are a great alternative (the salted caramel latte is my FAVORITE), and what I normally drink for lunch; at work I rarely have time for a sit down meal so they help me to get my protein and a bunch of nutrients on the go!

The vegetables that help to boost your stamina are: red beets (I really don’t like them, but they have been shown to increase your muscle stamina), spinach (filled with fiber, vitamin A, vitamin C, and  calcium), green cabbage (filled with phytonutrients that fight off free radicals and help heal damage), watercress (full of Vitamin A, B, C, Iron, magnesium, and calcium), and pumpkin (has anti-inflammatory effects to soothe those hard worked muscles and fiber filled). But truly, as long as you get your favorite veggies in, and they aren’t laden with butter (use extra virgin olive oil instead), your body will be happy.

Lean proteins should also be included in your diet: fish (shellfish and regular swimming fish), chicken, quinoa, chia seeds, and beans. If you are looking to boost muscle mass, you can always eat your proteins atop a protein, like eating some black beans, and maybe using the alternative of a bed of quinoa instead of rice.

You should be getting carbohydrates from your veggies, remembering that the more colorful your plate, the more vitamins and nutrients you are getting, which is good for you! And, of course you can eat breads, but make sure that they are whole grains and eat veggies with your carbs (think toast with some avocado atop it for breakfast!)

The cleaner your diet, with more protein the night before your hard workouts, along with your 2 liters of water throughout the day, your body will feel strong, you will feel good about yourself, and you will have the stamina and endurance to get through your hard workouts. Eating things that are high in fats will not make you feel good, and your workouts will reflect that….that being said, everyone has a cheat day on their diet, just make sure to use those cheats sparingly and your body will thank you!!

P.S. Don’t forget to join the June Exercise Challenge on Facebook!

Yours in Good Health

B

June Exercise Challenge: Get a beach ready body!

I have had an amazing group of people who have joined the April Squat and May Plank Exercise Challenges; all of us have transformed our bodies, improved our health, and feel amazing. I must say, the May Plank Challenge seemed super hard for all of us, and it was, but we dug deep and got through it, and I think that we all felt amazing finishing the challenge!

So, for June, as we continue with some core work, we will be adding some upper body strength in the form of a dual challenge: Bicycle Crunches AND Push-ups! I know that people think Push-ups are horrible and basically the worst things ever, but after finishing the plank challenge you already have the core strength you need, we will be strengthening our upper bodies (think, arms!).

What are the benefits of these exercises?

Bicycle Crunches: these crunches target the internal and external obliques (part of your abdominal muscles that usually don’t get worked out with standard crunches), as well as the rest of your abdominal muscles (transverse and rectus abdominis).

Push-ups: this exercise is a great way to not only strengthen the core muscles BUT you also strengthen your wrists, forearms, chest (pectorals), shoulders, along with your biceps and triceps (upper arm muscles). Women tend to have less upper body strength than men, and they are a great way to start slowly and build it up, but you also strengthen/tone muscles in the legs, back, and abs (just like the planks).

How do I perform them correctly?

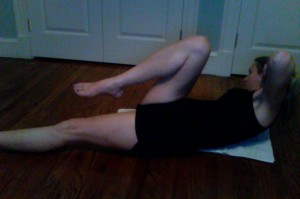
Bicycle crunches: Lie down flat, and rest your hands (interlocked) behind your head without putting pressure on your neck. Lift your legs so they are off the floor 2-4 inches, and exhale as you reach your left armpit to your right knee (as you pull your right knee up), hold for a second, then release and pull your left leg up as your pull your right armpit to it. Make sure you are using you core and NOT pulling on your neck, and go slowly, when people do these quickly they don’t see results AND they get hurt. So go slow and if you have lower back discomfort from laying flat, you can put a towel or extra mat under your lower back for some extra support.

Bicycle Crunch

Bicycle Crunch


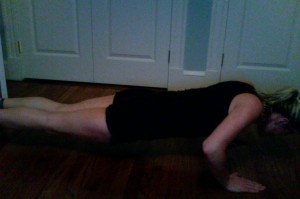
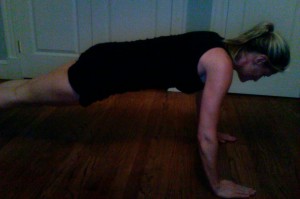
Push-Ups: Get into a plank position (resting on your knees for beginners) and your arms shoulder width (or just a little wider for beginners) apart. keep your head and neck straight and in line with the rest of your body, keeping your hips straight, and bend your elbows down about 6 inches, then pull yourself back up to the starting position.

Bottom Position

Bottom Position

Top (starting and ending) Position

Top (starting and ending) Position


The Challenge (should you choose to accept it):

Day 1: 20 Bicycle crunches (BC) and 2 sets of 10 push-ups (PU)

2: 30 BC & 2 sets PU

3: 40 BC & 3 sets PU

4: 50 BC & 3 sets PU

5: 60 BC & 4 sets PU

6: 70 BC & 4 sets PU

7: Rest Day

8: 75 BC & 5 sets PU

9: 80 BC & 5 sets PU

10: 90 BC & 6 sets PU

11:100 BC & 6 sets PU

12: 110 BC & 7 sets PU

13: 120 BC & 7 sets PU

14: Rest Day

15: 125 BC & 8 sets PU

16: 130 BC & 8 sets PU

17: 140 BC & 9 sets PU

18: 150 BC & 9 sets PU

19: 160 BC & 10 sets PU

20: 170 BC & 10 sets PU

21: Rest Day

22: 175 BC & 11 sets PU

23: 180 BC & 11 sets PU

24: 190 BC & 12 sets PU

25: 200 BC & 12 sets PU

26: 210 BC & 13 sets PU

27: 220 BC & 13 sets PU

28: Rest Day

29: 230 BC & 14 sets PU

30: 250 BC & 15 sets PU

DONE!!!  You all can do it!  Split the BCs up as you need to, and if you have any medical conditions that may prohibit you from these exercises, please check with your Healthcare Practitioner before joining!

(For those of you who have done previous challenges, I still encourage 50-100 maintenance squats a day and no need for continued planks, as we will be getting the same benefits PLUS from the Push-ups!!)

Join me, won’t you?
Yours in Good Health,

B

Laser Hair Removal: Does it work?

I have been an avid waxer for years, and I truly did not believe in laser hair removal, as I knew people years ago who tried it, and it didn’t work for them at all, so I thought for quite a hefty price tag, if it didn’t work, I might else well stick with waxing! I have one friend that swears by laser hair removal, and I found a Living Social deal, and decided to go for it. I am halfway through treatments and it is one of the BEST decisions I have ever made in my life. That being said, there are a few things that you should know before going in for treatment.

What do I need to know?

The laser emits a wavelength of light that is absorbed into your hair shaft and down into the follicle (the base/root of the hair) and after repeated treatments (usually around 6) the hair follicle becomes so weak it can no longer grow hair or it just dies completely, and no longer makes hair.

Because the laser is attracted to darker hair, you will have better results if you have light skin and dark hair (meaning even if you have lighter skin tones but tan in the summer, you may want to skip the summer months when you are tan if you want optimal results.)

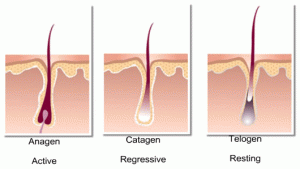
You will need to go for usually 6 treatments, that allows you to get each follicle in the phase of hair growth when the hair is actively growing (there are three stages of hair growth, and only one is active).

laser_hair_removal2

You should stop waxing or any other methods of hair removal (other than shaving) for around 6 weeks before you get your first treatment, and you should only shave between treatments, this allows for all of the hair follicles to grow, so that you have the best chance of treating each follicle with growth.

Between treatments, you really should exfoliate at least three times week, with a loofah and  an exfoliation scrub, to allow for the weaker hairs to break through the skin and prevent ingrown hairs. Plus, exfoliation helps to remove the hairs that are dead at the shaft.

No plucking between treatments! You want the laser to kill off the hairs, not you and your tweezers.

If you are getting laser hair treatment in a sensitive area (i.e. face, bikini, brazilian, etc),  you may want to get a cream with lidocaine in it to numb the skin before your treatment (apply 30 minutes before your first treatment.) But elsewhere, it doesn’t really hurt at all…just feels sometimes like a small snap with a thin rubber band (at the worst.)

Ask around before starting treatments at one place: just like anything else, the price may be indicative of the level of competence of the people administering the treatment and also  how good the laser is. There are newer lasers and older technology lasers that may not be as good. The salons/spas that offer these treatments are not FDA regulated, so ask how long they have been doing these treatments, their level of comfort, and expected results with their laser. I had my underarms done at one place, which I thought was good, and tried a different laser treatment center for my legs, and there is NO comparison.  My legs, obviously, cost more, but the laser was so much better and the technician is an MD that has been doing these treatments for years, so I had amazing results without any ingrown hairs, and needed less treatments!

Ask around, find out where has a good reputation, and gets good reviews from patients. If you feel uncomfortable, or they are trying to push you into extra treatments that you don’t need, then leave.  There are tons of medical spas/salons that you can go to that will offer you excellent Laser Hair Removal treatments.  I must say, for all of you in the Greater Boston Area, Landa Comsetic & Spa in Framingham is the BEST in the area, with great pricing and the staff all are very well-trained and they have the newest in laser technology (it is where I went for my legs and now basically every other place on my body!!)

It is an amazing experience to have complete hair removal and never have to think about shaving, waxing, plucking, etc again! If you’re thinking about doing it, I highly suggest it, but definitely do your homework on the place before you start treatments, and ensure that it will work for your hair color/skin tone!

Yours in Good Health

B

Some simple ways to treat calluses

Calluses are pretty commonplace for any avid athlete or really anyone on the go, and they are not a huge health issue, but they can be quite unsightly and they can be uncomfortable sometimes. The good news is that there are ways to prevent them AND means to treat them at home, if you have them!

What are calluses?

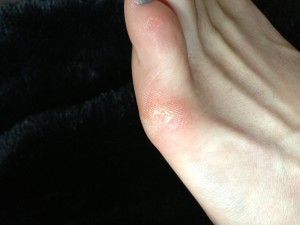
They are the bodies defense against constant (or frequent) pressure and friction. The body tends to compact layers of skin cells on areas where there tends to be a lot of pressure/friction so that when it occurs, it is not painful or constantly causing damage (i.e. you will eventually stop getting blisters from a certain pair of shoes because you have either “broken in” your shoes OR your feet!) When they develop, they really are not painful, but they can occur after blisters have formed (which is uncomfortable) and healed. They can be skin toned, grayish/white, or darker in color and either flattened to your skin, just rougher patch of skin, or raised.  Some people are more prone to calluses due to a lack of cushioning between bones and skin tissue (especially in the feet). Regular calluses, are nothing to be worried about, but some people can get very a very rare type of cancer that mimics calluses, amelanotic melanoma, so if you have a sudden callus growth that seems irregular and has cropped up suddenly, it is best you get it checked out by your HCP. Also, if you get pain, swelling, a lot of heat/redness, or any draining (like pus) from the area,  along with a fever, especially if you have Diabetes.

CallusHow can I prevent them?

The best way to prevent calluses is wear shoes that fit, with socks with cushioning. As well, if you tend to get calluses on your hands from working with your hands, wearing properly cushioned and fitting work gloves can hep to prevent that friction and rubbing and prevent the formation of calluses. Also if you have any sort of foot abnormality (like flat feet, any toe amputations, bone protrusions, bunions, etc.) to begin with, you should be under the care of a podiatrist to help and put measures in place to prevent calluses or skin breakdown, like using orthotics or moleskin. Do not try to remove entire calluses by yourself, but you can try some at home treatments, to diminish them.

How can I treat them at home?

You can get medicated pads (usually medicated with salicylic acid that helps to dissolve the thickened skin) at your local pharmacy, and place around the callus to help and decrease pressure on the area.

Change your shoes or gloves that are causing the calluses, find something that fits better

Walk barefoot at home, so your feet can evenly distribute pressure and weight without pressure from shoes.  And leave your hands out of gloves as much as possible.

Soak the areas with warm water and Epsom Salts (or essential oils, or with tea bags) to soften the area, and then you can scrape the area with a pumice stone to work down the callus.  Complete removal can be painful, and you really shouldn’t scrape it off with a razor blade, as it increases the risk of infection and you run the risk of cutting too low.

Always moisturize the areas after soaking with emollient rich moisturizer such as coca butter, shea butter, or hemp seed oil.

If at home treatments are not working and they are causing you discomfort or you are not sure if it may be more than a callus, talk to your HCP and see if you may, in fact, have some other sort of issue and need further treatments. But try to make sure that shoes and gloves are well-fitting, along with maintaining proper hygiene and always use moisturizer!

Yours in Good Health

B