December Exercise Challenge: Beat the Holiday Weight Gain!

This exercise challenge was created to beat the holiday bulge, strengthen your core muscles, keep working and improving leg strength, and increase upper body strength.  It is a mixture of exercises that will help us ladies feel good and look good! And every time you want to swear at me for making you do a push up, think about the fact that you are tightening your pecs and helping to keep your upper body nice and toned and perky!!  Join me, get mad at me, and show me up by getting fit and healthy and preventing the holiday weight gain!!

The main exercises we will focus on are:

Squats: Strengthen your lower body and core muscles such as the quadriceps, hamstrings, calf muscles, gluteals, lower abs, and lower back muscles. To perform a squat appropriately, you want to squat straight down (feet hips width apart) as if you are about to sit in a chair (think butt out) as far down as you can go keeping your balance and posture, then stand back up straight.

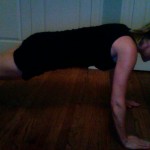
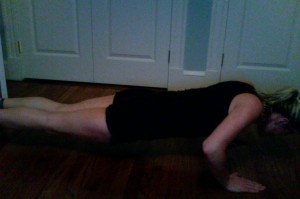
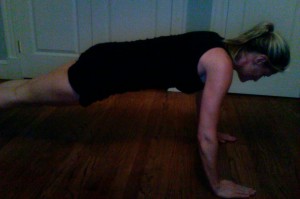
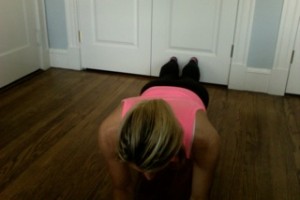
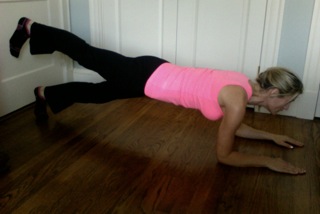
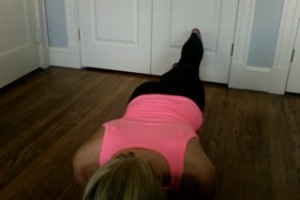
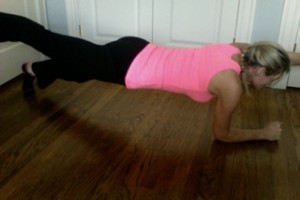
Planks: Strengthen your upper, middle, and lower core such as the rectus abdominis, transverse abdominis, oblique muscles, pectoralis, serratus, and the quadriceps muscles. You can perform a plank from your knees OR resting on your elbows with your forearms resting on the ground (modified) OR from a high plank position with your hands shoulder width apart, straight body, and on the balls of your feet. Hold steady keeping your back straight and butt in!Plank view 1
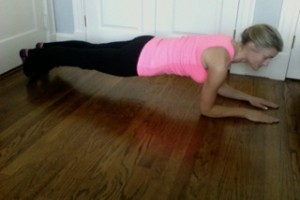
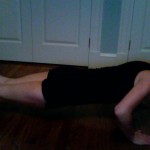
Push-Ups: Strengthen and tone abdominals, pectoralis, triceps, and bicep muscles. You can perform a push up from your knees (modified) or from a high plank position (hands shoulder width apart, straight body, and on the balls of your feet), with a straight body, in a controlled motion, lower your body to 6” off the ground, and push back to the top position.

Top (starting and ending) Position

Top (starting and ending) Position


Bottom Position

Bottom Position

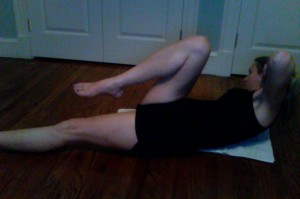
Reverse Crunches: strengthen and tone the lower abs, hamstrings, and quadriceps. Perform laying flat on the ground (with hands under your lower back from comfort, if necessary), pull your knees into your abdomen, then push out to straight legs with pointed toes 6” off the ground, and pull them back in.

Oblique Crunches: Strengthen and tone the external oblique abdominal muscles. Perform with your legs at a 45 degree angle raised 6” off the floor and your upper torso also 6-8” off the floor, either with a medicine ball or pretending to hold one, twist to the left with your upper torso and keep your legs in the same position, then go back to center and repeat on the right side. Each side is considered one “crunch”.

Straight Crunches: Strengthen and tone your core abdominal muscles. Perform with your hands interlaced behind your head, not pulling on your head or neck, and with your knees bent and back flat on the floor, pull up using our core abdominal muscles to a 45 degree angle and release, in a controlled fashion.

The Challenge (should you choose to accept it): 

Day 1:  50 Squats & 2 minute Plank

Day 2:  75 Squats & 3 minute Plank

Day 3:  85 Squats & 25 Push-ups

Day 4:  100 Squats & 40 Push-ups

Day 5:  50 Push-ups & 3 minute Plank

Day 6:  4 minute Plank & 100 Squats

Day 7:  Rest Day

Day 8:  5 minute plank

Day 9:  40 Reverse Crunches & 110 Squats

Day 10: 50 Reverse Crunches & 6 minute Plank

Day 11: 60 Reverse Crunches & 50 Push Ups

Day 12: 50 Oblique Crunches & 50 Reverse Crunches

Day 13:  7 minute Plank

Day 14: Rest Day

Day 15: 50 Push Ups & 80 Oblique Crunches

Day 16: 120 Squats & 8 minute Plank

Day 17: 140 Squats & 60 Oblique Crunches & 60 Reverse Crunches

Day 18: 100 Straight Crunches

Day 19: 60 Push Ups & 60 Straight Crunches & 60 Oblique Crunches

Day 20: 8 minute Plank

Day 21: Rest Day

Day 22: 100 Reverse Crunches & 75 Push Ups

Day 23: 160 Squats & 120 Straight Crunches

Day 24: 170 Squats & 80 Oblique Crunches & 80 Reverse Crunches

Day 25: 80 Push Ups & 140 Straight Crunches

Day 26: 200 Squats & 100 Oblique Crunches & 100 Reverse Crunches

Day 27: 9 minute Plank

Day 28: Rest Day

Day 29: 90 Push Ups & 150 Crunches

Day 30: 100 Push Ups & 230 Squats

Day 31: 10 minute Plank

And as always, if you have any medical problems, please speak to your HCP before starting the challenge, and you can always modify the exercises to prevent any injury!

Yours in Good Health

B


November Exercise Challenge: Beat the Holiday Bulge!

As always, please check with your healthcare provider if you have any specific healthcare needs, and to make sure that you can partake in this challenge. You can always feel free to add or omit weights based upon your personal fitness levels.  And before and after pictures are always a plus so we can see how much we’ve all improved our form!

Since I haven’t posted an exercise challenge in a couple of months, and we have been left to our own devices, I’m going to start it slow, and use some exercises we have done in the past, change-up a few, and then add some new stuff in! Get excited, and get ready to kick up your exercise and get ahead to prevent that dreaded holiday bulge!  This month we will be working on our core abs, hips, and legs, to keep strong and feeling good heading into the holiday season.

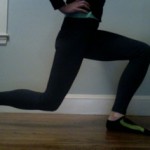
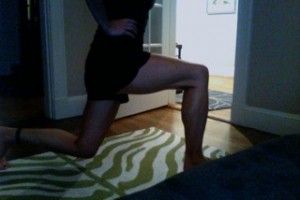
Kick lunges work your quadriceps, hamstrings, gluteals, and calves. From and standing position, legs hip width apart, start by lunging backwards with your left leg until your right thigh is parallel with the ground, then rise up and kick your left leg out in front of you (hip height), return to the standing position, then repeat on the other leg.kick lunge

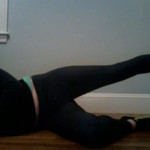
Side leg lifts  work your abductor, AKA hip, muscles (can be made more challenging with a resistance band or ankle weights).  Lay on your side with the leg you are laying on bent at a 45-degree angle, with your upper arm on the ground, bend your elbow and rest your head in your hand.  Keep your top leg straight, and lift it directly up to hip height, then slowly bring it back down to the resting position, switch sides. side leg lift

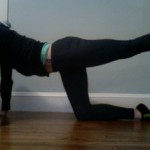
Back Kicks (or Donkey Kicks) work your core abdominal muscles and your gluteals (can be made more challenging by adding a resistance band or ankle weights). Rest on your hands and knees, slowly kick one leg back until it is straight back until it is hip height, then slowly bring your knee into your chest, then down to resting position, switch sides. Donkey kick

Day 1: Kick Lunges (KL) 10 on each leg and Side Leg Lifts (SLL) 15 on each leg

Day 2: KL 15 on each leg and SLL 20 on each leg

Day 3: KL 20 on each leg and SLL 25 on each leg

Day 4: KL 25 on each leg and SLL 30 on each leg

Day 5: KL 30 on each leg and SLL 40 on each leg

Day 6: KL 35 on each leg and SLL 45 on each leg

Day 7: REST Day!!

Day 8: KL 40 on each leg and SLL 50 on each leg

Day 9: KL 50 on each leg and SLL 60 on each leg

Day 10: KL 60 on each leg and SLL 70 on each leg

Day 11: KL 70 on each leg and SLL 80 on each leg

Day 12: KL 80 on each leg and SLL 90 on each leg

Day 13: KL 90 on each leg and SLL 100 on each leg

Day 14: REST Day!!

Day 15: KL 100 on each leg and Back Kicks (BK) 20 on each leg

Day 16: KL 110 on each leg and BK 20 on each leg

Day 17: KL 120 on each leg and BK 40 on each leg

Day 18: KL 130 on each leg and BK 60 on each leg

Day 19: KL 140 on each leg and BK 80 on each leg

Day 20: KL 150 on each leg and BK 100 on each leg

Day 21: REST Day

Day 22: KL 100 on each leg, BK 20 on each leg, and SLL 50

Day 23: KL 110 on each leg, BK 20 on each leg, and SLL 50

Day 24: KL 120 on each leg, BK 20 on each leg, and SLL 50

Day 25: KL 130 on each leg, BK 20 on each leg, and SLL 50

Day 26: KL 140 on each leg, BK 20 on each leg, and SLL 50

Day 27: KL 150 on each leg, BK 20 on each leg, and SLL 50

Finished! You are looking better, feeling better, have a stronger core and leg muscles, and are ready to continue to dodge that holiday bulge throughout December! Strong core, gluteal, and leg muscles help to stabilize us and make us actually feel stronger.  Keep up the good work!  And join our Facebook Fitness Challenge page to get added tips, ask questions, and cheer each other on!

Yours in Good Health

B
Lunge Plus Challenge: Tighten your core and lower body!

For those of you who have been joining the April, May, June, and July Challenges, this one should be a good mix of all of the muscles we have been working on, and increasing our cardio and stamina, along with toning. For the August challenge, we will focus back on those lower legs doing lunges (both standing alternating, and walking) and burpees to help to work on agility and coordinate strength.

LungeLunges: 

All forms of lunges work the hips, abdominals, glutes, quads, hamstrings, and calf muscles. SO we will be tightening and strengthening the lower core muscles and the legs in this challenge! To perform a standing lunge properly:

Step forward with one leg. While keeping your back straight, bend your other leg until parallel with the floor and your back knee almost touches the floor. Make sure your front knee does not go over your ankle, it can cause injury and make you unstable.

 To perform an alternating walking lunge: 

Perform the same lunge as described above, but actually propel yourself forward and basically walk in a series of lunges!  You may look a little silly but you can add it into a daily walk or during chores; I do it all the time!

Burpees:

They are meant to be done in rapid succession, and through the various different exercises target your hamstrings, gluteal muscles, calves, biceps, triceps, pectoral muscles, hip flexors, and abs.  They are one stop shopping kind of exercises, so get ready to really test yourself!  To perform them properly:

1. Start standing upright    2. Drop to a squat with your hands on the floor    3. Keep your feet hands flat and kick your feet directly back   4. Immediately bring your feet back to the squat position   5. Jump back up to the standing position with your hands extended over your head.

As with all of the challenges, this is very difficult and if you have any medical issues you should speak with your Healthcare provider and obtain approval before starting.  Also, if you feel that you need to take a break on a day not listed as a rest day, listen to your body!

Day 1: 10 Burpees 10 Alternating lunges
Day 2: 10 Burpees 14 Alternating lunges
Day 3: 10 Burpees 18 Alternating lunges
Day 4: 10 Burpees 20 Alternating lunges
Day 5:10 Burpees 24 Alternating lunges
Day 6: 10 Burpees 26 Alternating lunges
Day 7: REST DAY
Day 8: 20 Burpees 26 Alternating lunges
Day 9: 20 Burpees 26 Alternating lunges
Day 10: 20 Burpees 30 Alternating lunges
Day 11: 20 Burpees 30 Alternating WALKING lunges
Day 12: 20 Burpees 36 Alternating WALKING lunges
Day 13: 20 Burpees 36 Alternating WALKING lunges
Day 14: REST DAY
Day 15: 30 Burpees 40 Alternating WALKING lunges
Day 16: 30 Burpees 40 Alternating WALKING lunges
Day 17: 30 Burpees 50 Alternating WALKING lunges
Day 18: 30 Burpees 60 Alternating WALKING lunges
Day 19: 40 Burpees 70 Alternating WALKING lunges
Day 20: 40 Burpees 80 Alternating WALKING lunges
Day 21: REST DAY
Day 22: 50 Burpees 86 Alternating WALKING lunges
Day 23: 50 Burpees 86 Alternating WALKING lunges
Day 24: 50 Burpees 90 Alternating WALKING lunges
Day 25: 50 Burpees 90 Alternating WALKING lunges
Day 26: 60 Burpees 96 Alternating WALKING lunges
Day 27: 60 Burpees 96 Alternating WALKING lunges
Day 28: 70 Burpees 100 Alternating WALKING lunges
Day 29: 70 Burpees 100 Alternating WALKING lunges
Day 30: 80 Burpees 100 Alternating WALKING lunges

Enjoy the challenge and be strong!

Yours in Good Health

B
July Exercise Challenge: Lose that Arm Jiggle!

Ask and ye shall receive! I was asked for more upper body sculpting in the July challenge….however there was a lot of dislike for the June Challenge push ups (which are a fabulous upper body workout!) So, despite the fact that I have been trying to keep these workouts as “prison” workouts (i.e. you need nothing more than your own body to make them happen), we will be stepping it up this month and we need to use dumbbells for this one, so use whatever weights you are comfortable with (2lb-6lb to start) and then increase as you feel comfortable throughout the month. We want to strengthen our triceps and biceps, to make the upper body, shoulders, and arms looked toned and taught.  In conjunction with the planks, squats, push ups, and bicycle crunches we’ve been doing, our bodies should be rocking right now!!

We will we focusing on two main exercises:

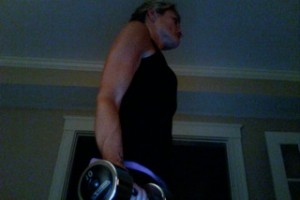
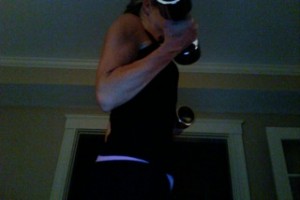
Bicep curls: Tone your upper arm muscles AND make activities of daily life easier, like carrying kids, groceries, lifting various items, and you will look better in sleeveless outfits! hold your dumbbells, with you feet shoulder width apart, palms facing forward, shoulders and back straight, elbows in to your sides, and squeeze your biceps to pull the dumbbells up, then slowly go down to the starting position.


Starting point

Starting point

Chair Dips: Helps to get rid of arm jiggle and tone, strengthening those

Ending point

Ending point- Bicep Curl

triceps! How to do it? Sit on the edge of a chair, while sitting on the chair, grasp the side of the seat, move your butt off the edge of the chair (with your legs straight in front of you), keeping your back straight and shoulders at a neutral position, lower your self down as far as you can go, then pull yourself back up in a slow controlled motion.


For everyone who has been doing the previous challenges (April, May, and June) , I encourage continuing with 75 crunches a day, 5 minutes of planks, 50 bicycle crunches, and 25 push ups….and some cardio (at least 15-20 minutes of brisk walking, running, biking, etc) then we are adding these on top! This is starting to get REAL 🙂

The July Challenge Schedule:

1: 5 Chair Dips and 10 Bicep curls

2: 10 Chair Dips and 20 Bicep Curls

3: 15 Chair Dips and 25 Bicep Curls

4: 15 Chair Dips and 30 Bicep Curls

5: 20 Chair Dips and 35 Bicep Curls

6: 20 Chair Dips and 40 Bicep Curls

7: Rest Day

8: 25 Chair Dips and 45 Bicep Curls

9: 30 Chair Dips and 50 Bicep Curls

10: 30 Chair Dips and 55 Bicep Curls

11: 35 Chair Dips and 60 Bicep Curls

12: 40 Chair Dips and 70 Bicep Curls

13: 45 Chair Dips and 80 Bicep Curls

14: Rest Day

15: 50 Chair Dips and 90 Bicep Curls

16: 60 Chair Dips and 100 Bicep Curls

17: 70 Chair Dips and 110 Bicep Curls

18: 75 Chair Dips and 120 Bicep Curls

19: 80 Chair Dips and 130 Bicep Curls

20: 90 Chair Dips and 140 Bicep Curls

21: Rest Day

22: 100 Chair Dips and 150 Bicep Curls

23: 100 Chair Dips and 160 Bicep Curls

24: 110 Chair Dips and 170 Bicep Curls

25: 120 Chair Dips and 175  Bicep Curls

26: 125 Chair Dips and 180 Bicep Curls

27: 130 Chair Dips and 190 Bicep Curls

28: Rest Day

29: 140 Chair Dips and 195 Bicep Curls

30: 150 Chair Dips and 200 Bicep Curls

Remember if you are having pain or discomfort, focus on your body positioning, and you may need lower weights, or just to take a break.  I have added in a break every 7 days, but listen to your body and if it needs it, take a break; you will be sore, so drink plenty of waters to flush out the lactic acids, but if you feel more than sore, and you feel pain, then reassess and take a break, if you need to.  And, as always, if you have a medical condition, please check with your Healthcare Provider (HCP) that it is OK to be a part of this challenge.

*And don’t forget to join our Facebook group for added tips and group support!

Yours in Good Health

B

June Exercise Challenge: Get a beach ready body!

I have had an amazing group of people who have joined the April Squat and May Plank Exercise Challenges; all of us have transformed our bodies, improved our health, and feel amazing. I must say, the May Plank Challenge seemed super hard for all of us, and it was, but we dug deep and got through it, and I think that we all felt amazing finishing the challenge!

So, for June, as we continue with some core work, we will be adding some upper body strength in the form of a dual challenge: Bicycle Crunches AND Push-ups! I know that people think Push-ups are horrible and basically the worst things ever, but after finishing the plank challenge you already have the core strength you need, we will be strengthening our upper bodies (think, arms!).

What are the benefits of these exercises?

Bicycle Crunches: these crunches target the internal and external obliques (part of your abdominal muscles that usually don’t get worked out with standard crunches), as well as the rest of your abdominal muscles (transverse and rectus abdominis).

Push-ups: this exercise is a great way to not only strengthen the core muscles BUT you also strengthen your wrists, forearms, chest (pectorals), shoulders, along with your biceps and triceps (upper arm muscles). Women tend to have less upper body strength than men, and they are a great way to start slowly and build it up, but you also strengthen/tone muscles in the legs, back, and abs (just like the planks).

How do I perform them correctly?

Bicycle crunches: Lie down flat, and rest your hands (interlocked) behind your head without putting pressure on your neck. Lift your legs so they are off the floor 2-4 inches, and exhale as you reach your left armpit to your right knee (as you pull your right knee up), hold for a second, then release and pull your left leg up as your pull your right armpit to it. Make sure you are using you core and NOT pulling on your neck, and go slowly, when people do these quickly they don’t see results AND they get hurt. So go slow and if you have lower back discomfort from laying flat, you can put a towel or extra mat under your lower back for some extra support.

Bicycle Crunch

Bicycle Crunch


Push-Ups: Get into a plank position (resting on your knees for beginners) and your arms shoulder width (or just a little wider for beginners) apart. keep your head and neck straight and in line with the rest of your body, keeping your hips straight, and bend your elbows down about 6 inches, then pull yourself back up to the starting position.

Bottom Position

Bottom Position

Top (starting and ending) Position

Top (starting and ending) Position


The Challenge (should you choose to accept it):

Day 1: 20 Bicycle crunches (BC) and 2 sets of 10 push-ups (PU)

2: 30 BC & 2 sets PU

3: 40 BC & 3 sets PU

4: 50 BC & 3 sets PU

5: 60 BC & 4 sets PU

6: 70 BC & 4 sets PU

7: Rest Day

8: 75 BC & 5 sets PU

9: 80 BC & 5 sets PU

10: 90 BC & 6 sets PU

11:100 BC & 6 sets PU

12: 110 BC & 7 sets PU

13: 120 BC & 7 sets PU

14: Rest Day

15: 125 BC & 8 sets PU

16: 130 BC & 8 sets PU

17: 140 BC & 9 sets PU

18: 150 BC & 9 sets PU

19: 160 BC & 10 sets PU

20: 170 BC & 10 sets PU

21: Rest Day

22: 175 BC & 11 sets PU

23: 180 BC & 11 sets PU

24: 190 BC & 12 sets PU

25: 200 BC & 12 sets PU

26: 210 BC & 13 sets PU

27: 220 BC & 13 sets PU

28: Rest Day

29: 230 BC & 14 sets PU

30: 250 BC & 15 sets PU

DONE!!!  You all can do it!  Split the BCs up as you need to, and if you have any medical conditions that may prohibit you from these exercises, please check with your Healthcare Practitioner before joining!

(For those of you who have done previous challenges, I still encourage 50-100 maintenance squats a day and no need for continued planks, as we will be getting the same benefits PLUS from the Push-ups!!)

Join me, won’t you?
Yours in Good Health,

B

May Plank Challenge: Join Me, Won’t You?

For the month of May, as we are focusing on getting healthier, getting stronger, toning our bodies, and encouraging one another to accomplish our goals (especially when some of use really do NOT enjoy the exercises), we will look to the plank! And, no I am not talking about just laying various pieces of furniture and posting pictures via social media, I am talking about the real deal plank (AKA a hover.)

To perform a proper plank:

You should rest on your elbows, should length apart (your hands can come together at the center or go straight forward, but your forearms need to stay on the ground) and your toes should also be on the ground.  Keeping your entire core tight, and in a straight line, relaxing your head/neck so that you are looking straight down, you should hold this position. Plank view 1

Plank view 2

*If this position is too difficult or you are unable to hold it because of any medical/health conditions, you can hold this position on your hands (in push up position)


There are also some alterations that you can add in:

Leg Lifts: lift one leg at a time approximately 6 inches off the floor, hold for 5 seconds, then alternate with the other leg, all while holding your back, torso, and shoulders straight.

in the side view my leg is lifted a little high- only around 6" off the ground

in the side view my leg is lifted a little high- only around 6″ off the ground


leg height is better here

leg height is better here


Plank with arm lift

Plank with arm lift

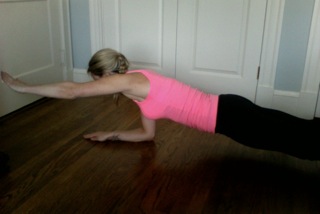
Arm lifts: Lift one arms at a time to shoulder height, and hold for 5 seconds, then alternate with your other arm, and maintain that straight back, torso and shoulders. You can do these by themselves OR when you lift the opposite leg.


Plank with alternating leg/arm lift

Plank with alternating leg/arm lift


How are planks going to transform my body?

Planks work to strengthen the core muscles in your body (your abdominal and back muscles) directly. Then there are other muscles that help to stabilize you in this pose and they strengthen as well:  shoulder muscles, pectoralis (chest), quads (upper legs), gluteals (butt), sartorius (thigh), serratus anterior (side of chest), tensor fasciae latae (thigh/hip), and gastrocnemius (calves).

Increasing your ability to hold these plank positions will help to strengthen and tone those muscles, which will not only make you appear leaner in your core, but also tighten your legs and butt too! Because we are strengthening your muscles, you will be burning more calories, even at rest, so when you feel sore, that is your muscles strengthening, and your body burning fuel. So, feel the burn, and love the burn: it means you are making progress!

The Challenge (…if you choose to accept it):

And for those of you who did the April Squat Challenge, keep maintenance squats ranging from 50-100 5 days a week (if you are able physically and medically).  If you have any specific medical and/or physical limitations, you should speak with your personal healthcare provider before taking on a strenuous challenge.

Day 1: 1 minute

Day 2: 2 minutes

Day 3: 2.5 minutes

Day 4: 3 minutes

Day 5: 3.5 minutes

Day 6: 4 minutes

Day 7: REST DAY

Day 8: 5 minutes

Day 9: 5.5 minutes

Day 10: 6 minutes

Day 11: 6.5 minutes

Day 12: 7 minutes

Day 13: 7.5 minutes

Day 14: REST DAY

Day 15: 8 minutes

Day 16: 8.5 minutes

Day 17: 9 minutes

Day 18: 9.5 minutes

Day 19: 10 minutes

Day 20: 10.5 minutes

Day 21: REST DAY

Day 22: 11 minutes

Day 23: 12 minutes

Day 24: 13 minutes

Day 25: 14 minutes

Day 26: 15 minutes

Day 27: 16 minutes

Day 28: 17 minutes

Day 29: 18 minutes

Day 30: 19 minutes

Day 31: 20 minutes

This is a HARD challenge BUT you can split up the planks into any set of reps and times that works for you and your body (i.e. split up the 20 minutes into 2 sets of 10 minutes in the morning doing 2 minute reps, so 5 planks in the morning and at night and you hit your 20 minute goal.) You should be able start with reps of 30 seconds and be able to increase that pretty quickly, adding in the arm and leg lifts to make it more challenging and to improve your core strength.

So let’s do this and get healthy, fit, and ready for summer!! And don’t forget to join the Facebook Page for the May Plank Challenge, where you can ask questions, get support, and (for those that dare) post their pre/post challenge bodies!

Yours in Good Health,

B